
Add comfortable treads to protect your feet
I sail an older Macgregor 26 Classic. I love it in every way. Every way but one: it came with a swim ladder made of 1″ chrome tubing that just kills my feet.
Adding insult to injury, the ladder doesn’t reach deep enough into the water either, so getting up on that first step requires contortions and knee stress I couldn’t do thirty years ago, let alone today.
I’m 6′ 2″ and strung tight as a piano. But it’s not just me. I cringe and apologize watching guests struggle to get back on board after a lovely swim in the lake. It’s embarrassing for everyone. As skipper, I feel it’s on me.
I found two bolt-on step treads online, and both designs were iffy and ugly. So I made my own. It was fun! Easy and cheap too.
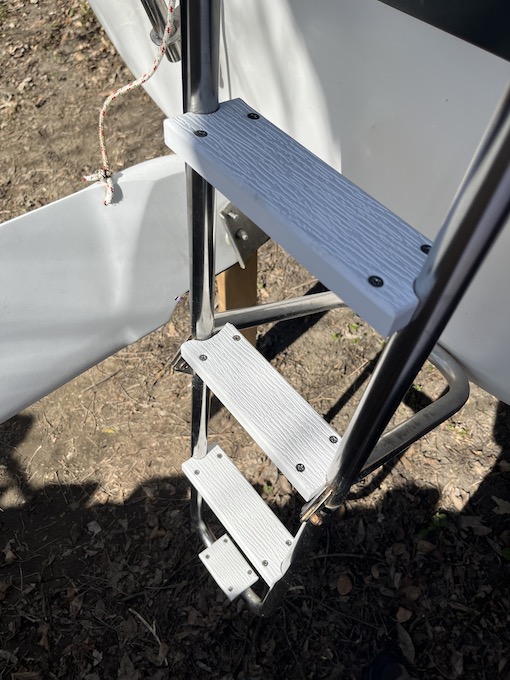
The trick was to make them stable even when wet, so they wouldn’t rotate like a trap door on the tubing. I could have screwed right into the tubes, but I’m averse to any hole-punching, and I like the option of changing my ideas later. So the general plan includes making them wider than the step rail so they wrap around the side tubes, and adding a track on the bottom that hugs the original rail for security.
I bought a few planks of vinyl fake-wood. It has a natural tread texture on one side, cuts and drills like wood, never rots, never needs paint. My kind of fake. This is what I found at Lowe’s; your hardware store will likely have something similar.
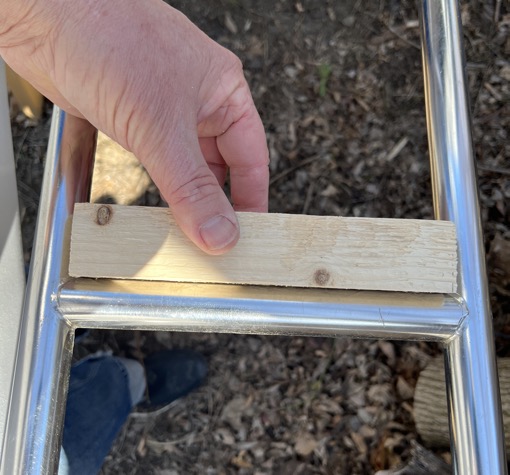
Measuring round things is hard, so I cut a block of scrap 2×2 to the exact width between the tubes. That proved to be a huge help later, as you’ll see.
Step 1: rout a track along the treads
By far the hardest part. And most fun. Vinyl wood dust is static-y, and routing makes a lot of dust. Dress to get dirty and you’ll be fine.
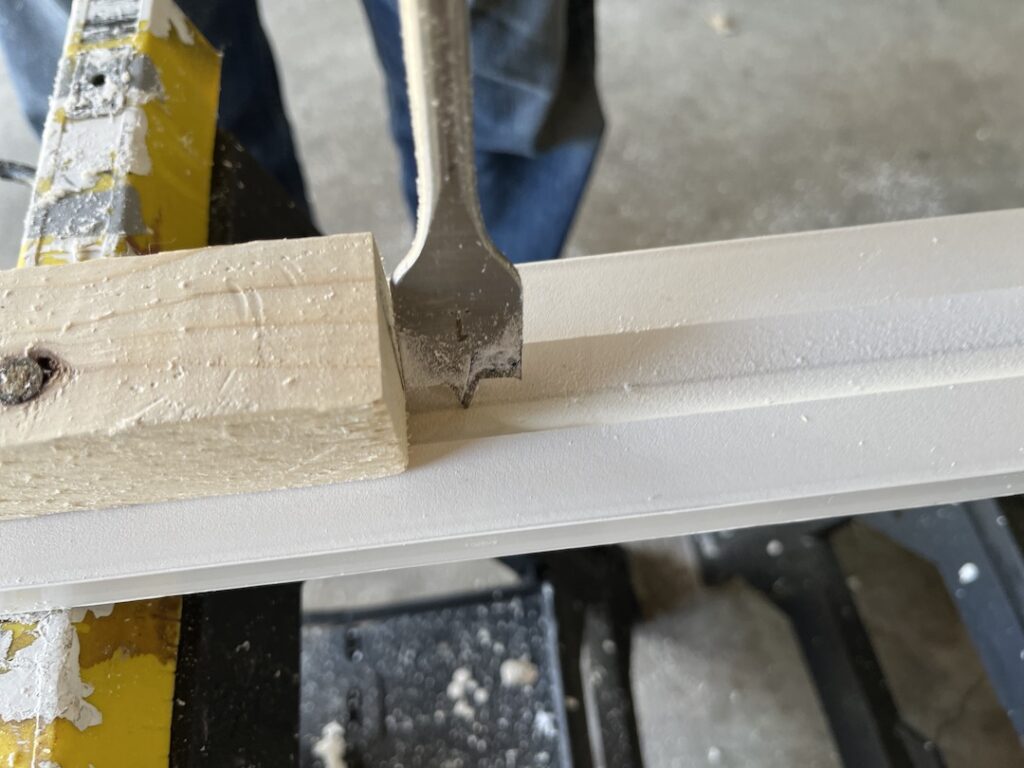
Rout the length of the whole plank at once. Look ahead to see why. I clamped some scrap onto my router so the bit would be easy to center along the bottom of the tread.
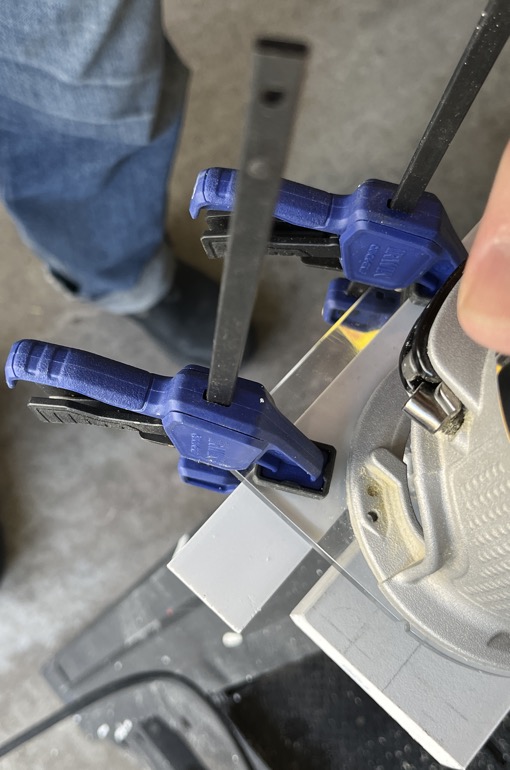
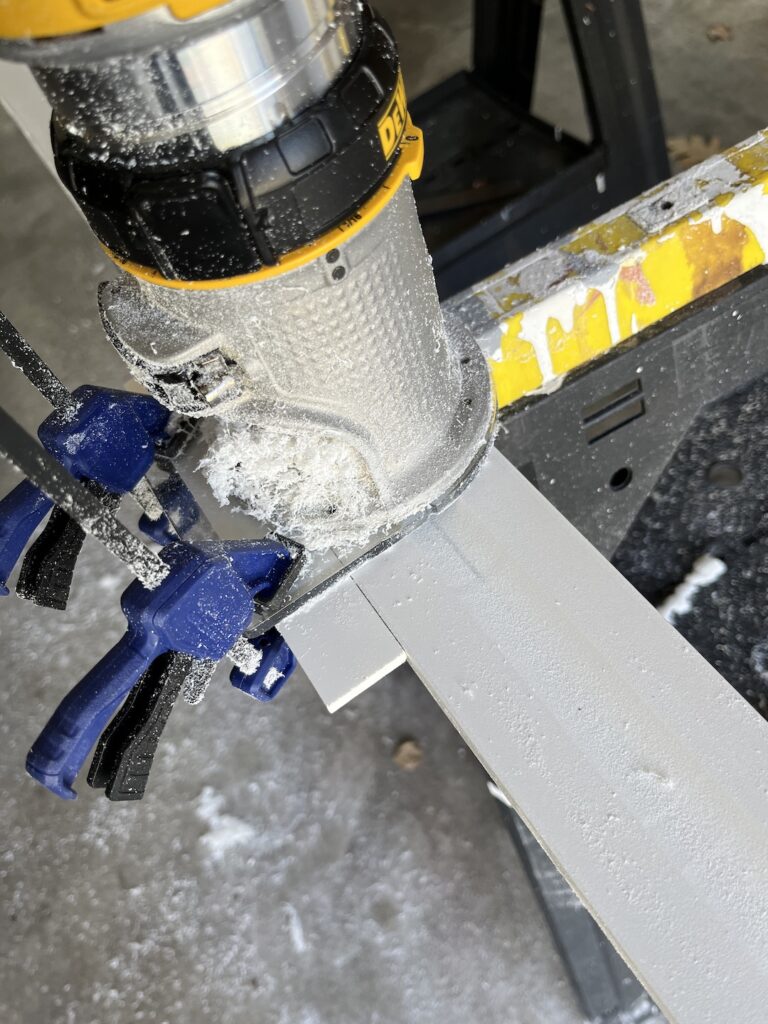
My step tubes are 1″ diameter, so I loaded a 1″ round bit. Duh. Set it a little less than halfway deep so your future clamps have a little room to bear down. It was a lovely coincidence that I had scrap PVC tubing that was the exact same diameter, so I could use it to test my trough depth.

By the way, those rubber-lined pipe hangers are brilliant. Get ’em in the electrical department of your hardware store. The rubber grips the tube, additional help to keep the treads from rotating on the pipe.
Rout the whole plank at once. Notice the mess I was talking about:
Step 2: cut the side wrap-arounds
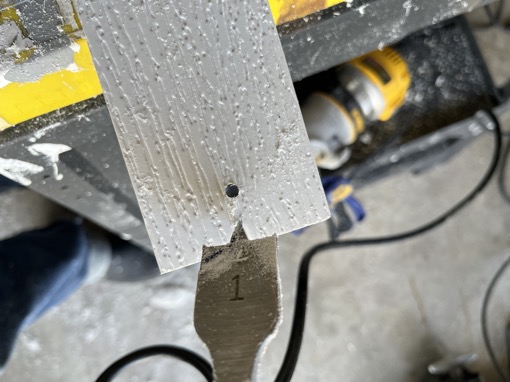
Now it gets easier. Start by cutting a hole in one end of the plank, centered on the trough. One-inch hole in my case, to match my one-inch tubing.
Remember that wood spacer from above? Time to shine. Align it right up to the inside edge of your first hole, and use the block to align the next hole. No marking, just set your drill bit in place and drill, baby, drill.
In the same fashion, move your spacer stick to the new hole, and drill another. And again, as many times as you need for your steps, plus one more hole than the number of steps you need. I needed three steps, so four holes. It’ll make sense in a second.
You can save some sanding later by using this trick: stop drilling as the tip of your spade bit pokes through from bottom to top. Flip the board over, poke the bit point into the little hole and finish drilling the hole from the top. This leaves a much cleaner edge.
Step 3: cut your treads to finished length
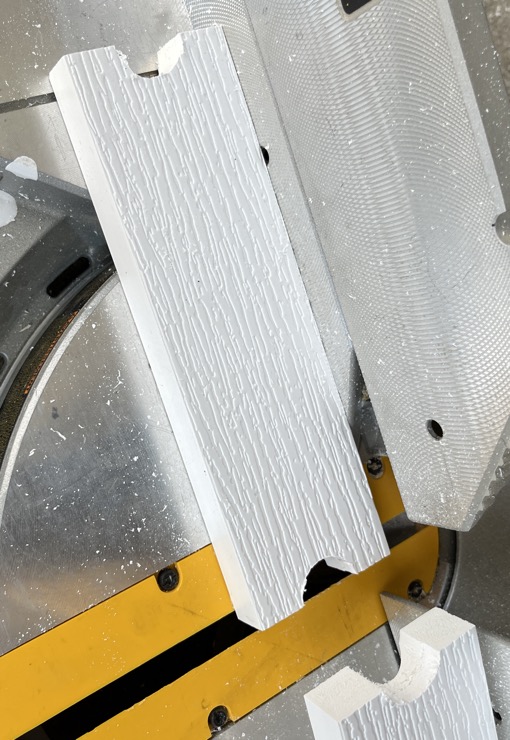
With a miter saw, cut the end off the first hole, so half of it is left.

Then cut each additional hole exactly in half. Your treads will be the perfect length, thanks to your wood spacer. Notice we didn’t use a tape measure even once?
Now’s the time to sand down the rough edges. Vinyl is pretty soft, so this goes fast. Style points: I also routed a very small rounded edge along on the top side. But you can do that with a sander or file too.
Step 4: bolt ’em on!
From the bottom of the tread and using the U-shaped pipe hangers as a guide, mark your holes to drill bolt holes that are a snug fit for your bolts. I used #6 machine bolts with flat heads, and acorn nuts for a smooth look and feel. Vinyl wood is a bit soft, so as you tighten the nuts, the bolt head will naturally countersink into the top face of the tread. Just tighten until they’re flush.
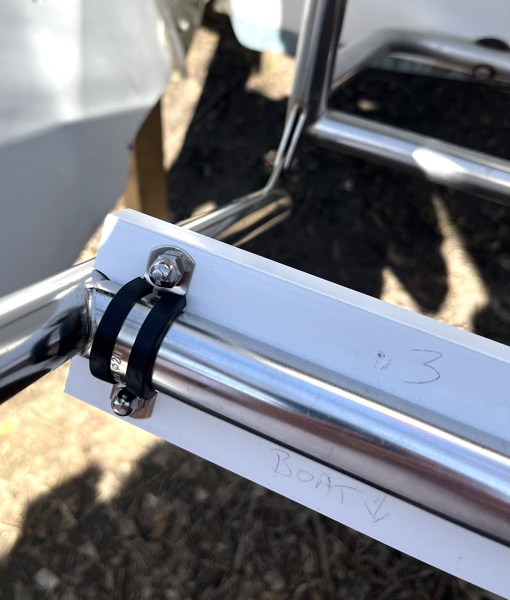
If you don’t trust that, roundhead screws with a washer would be super-sturdy. The trade-off is those bolt heads will be under your dainty feet.
One of my original tube steps is right at the hinge where the ladder folds, so I had to chip off the wrap-around a bit for that one. But it holds fine.
The bottom tube bends lazily in a big arc, so the wrap-around idea doesn’t work here. I cut the step shorter, bolted it tight, and crossed my fingers. Imperfect, so I just gotta be careful stepping on that one.
Bonus step: the bonus step
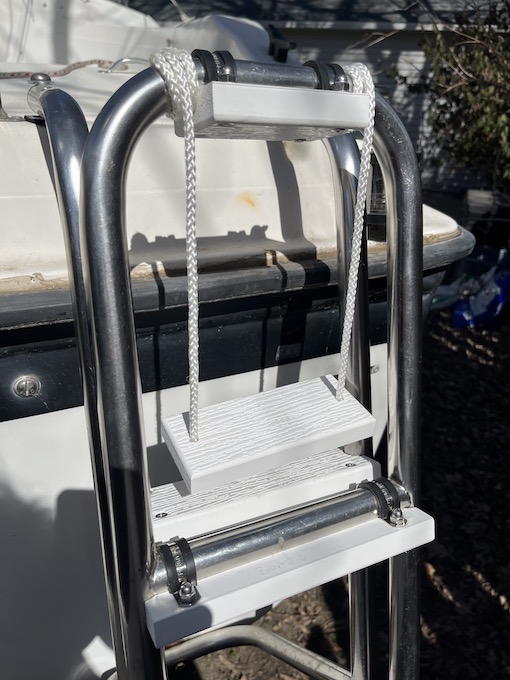
I mentioned this at the start: the lowest step on my ladder sits barely below the waterline. It’s really tough for me to get my foot up there, and then to get my weight over it. So I added a cheater step. It floats, but just slip your foot over it and gingerly put your weight on it. It gives me so much more leverage to get up out of the water without my knees exploding. It’s swingy, but hey — you’re already in the water.
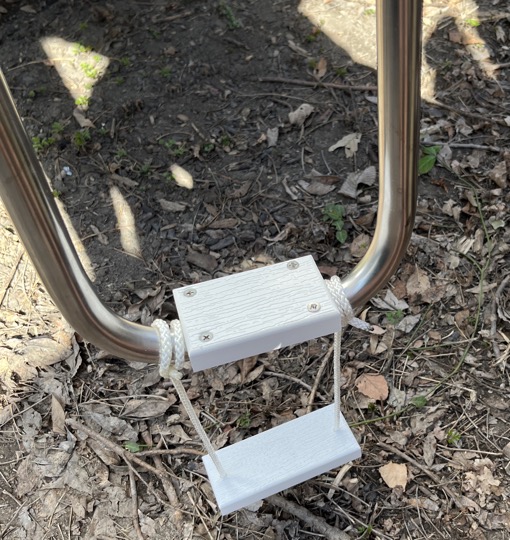
Cut one more length of tread to match the short tread on the bottom rung. (This tread doesn’t need the trough on the bottom since there’s no pipe to bolt onto.) Slip some waterproof rope through a couple of drilled holes in the step, and tie it to the bottom rung. I used a clove hitch, as you see in the photo above. Don’t do that. It slipped out when wet. [sigh]
An added bonus to your bonus step is that it makes a nice hanging handle to pull if you jumped into the lake and forgot to fold the ladder down first.
I used these for a whole season before sharing this, so I can say with confidence they saved my baby feet! Anyone with tips or clever adjustments, leave me a comment. I’ll share your ideas too!
0 Comments